Knitting makes me happy, computers keep me humble.
| Erica's Easily Expandable Anyone-Can-Make-One Shawl Workshop
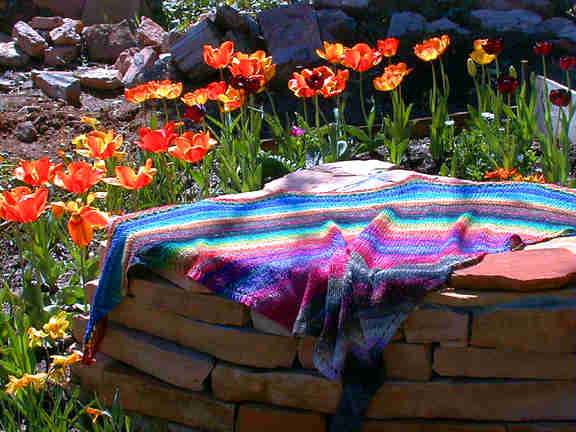
The shawl above is Noro's Silk Garden yarn...one ball of each color... No, I don't remember the needle size :-) Simplest
Shawl in Garter Stitch This is the
basic pattern: TIPS
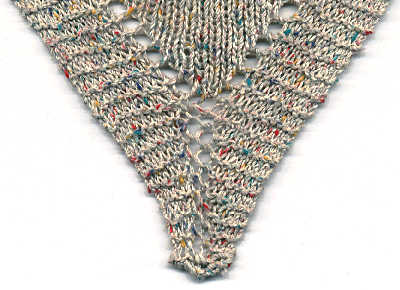
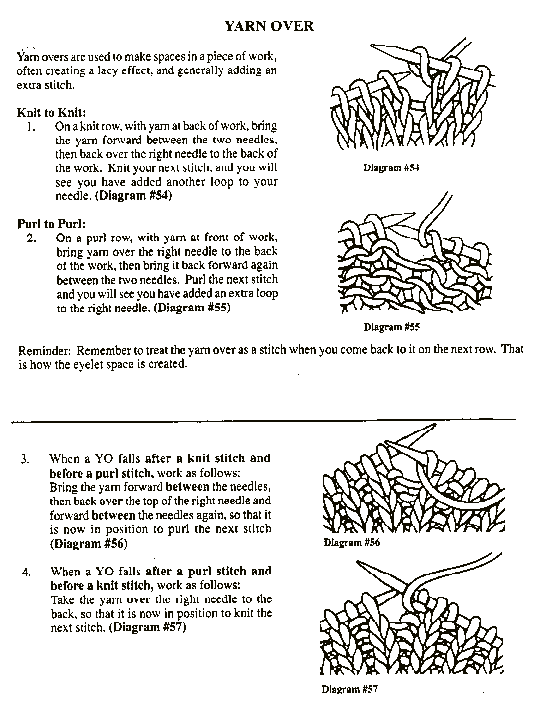
for the basic pattern: And what, you ask, does YO mean? Yarn over - the act of creating a stitch by wrapping the yarn around the needle, before making the next stitch. See a diagram here. The yarn over is your increase. This will make a garter stitch (every row knitted) shawl with a row of eyelets along both sides where you increase at the beginning of each row. The advantage to a garter stitch shawl is that it will not curl on the edges. The example
to the left is the tip of first one I did in this series and because
it is chenille you hardly notice that it is garter stitch - .the
worming chenille does is another story altogether. The purple one
is set to go off to a fund-raiser - we are on to new projects! |
|
Jessica's
Knit-Along Instructions and more
TIPS |
|
Simplest Shawl in Stockinette Stitch (StSt) Cast on three stitches Row One K1, YO, knit to end of row. Turn Repeat Row One until you have a total of ten stitches on the needle. Now, you will be dividing your work into three sections - two borders of five stitches each in garter stitch and a center section in stockinette. Next row K5, place marker, YO, place marker, knit 5. Turn Purl Rows K5, slip marker, YO, purl center stitches (one on this particular row), slip marker, K5. Turn Knit Rows K5, slip marker, YO knit center stitches, slip marker, K5 Continue previous two rows until you reach the desired size. You may wish to finish with a band of five rows of garter stitch so the top will match the sides. Bind off loosely. Now, in the purple shawl example above, it looks like I started with more that three stitches - so I didn't get the nice pointy tail I like now. And it also looks like I got to more like thirteen before I remembered to divide - five on each side and three in the middle. Oh well, hopefully you get that idea that these are just SUGGESTIONS and you may invent anything you like :-) I just love the flat simplicity of StSt - but knew I would need borders of Garter Stitch to keep the sides flat. When I first got this yarn, which is a tightly twisted wool, I just knew it had to be a wisteria pattern, so I made my first (and probably last) lace shawl with WAY too many rows in the pattern. It was NOT fun to refer to my cheat sheet every row - but it did turn out fabulous. |
|
A Thinking Woman's Shawl Cast on two
stitches Row One K1, YO, K1 In garter, you are knitting every stitch - as you get toward the middle of your row LOOK for the yarn over from the previous row(see pink sample on the left - mine are on the needle backwards. Notice the pink stitch in the center on the left needle - it's the YO from the previous row - learn to feel it coming. When I am here (just finished the stitch BEFORE the previous YO - this is place I want to do a YO for this row - before I knit the slanted stitch in the left needle. Following Rows. Work in garter placing the YOs in the middle of the row and BEFORE the slanted stitch (YO from the previous row. Continue until you have the number of stitches needed for your border. The gray silk shawl has ten stitches in each border, so when I completed the row that gave me a total of twenty stitches I divided as follows: Division Row K10, place marker, YO, place marker, K10. This YO is your first center body stitch. The "Rest" of the Shawl K10, slip marker, YO, knit to marker, slip marker, K10 Repeat this row until the shawl is the desired length. You may want to end with 10 rows of garter stitch to match the sides. Wash, Block, and Wear :-) |
|
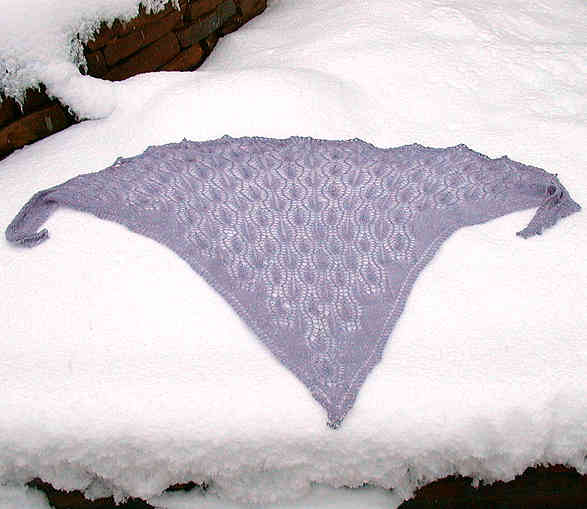
This one...in the winter garden is a tightly twisted wool...I'll never do a twenty row lace pattern again :-) In 2002 I sent this to the CIC Shawls for Caregiver's Project.
All photos and text copyright 2001 by Yours Truly |


